![]()
© 2004, 2005, 2006, 2007 by Man of the Cloth Productions
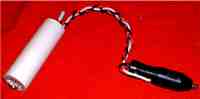

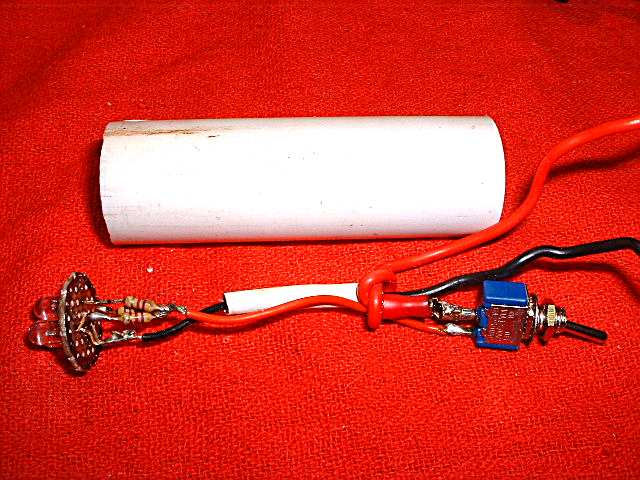
In my Zephyr I want to be able to read in the bunk at night. A cigarette-lighter type plug receptacle at the head of the bunk will give me the flexibility of using different 12 v DC lights. Halogen and florescent are bright lights, but I am interested in the low amperage draw of LED lights. I couldn't find any 12 v LED lights that were set up for this so I built one. I started with three bright white LED bulbs from http://www.superbrightleds.com/leds.htm along with a piece of perforated project board and a small switch from Radio Shack.
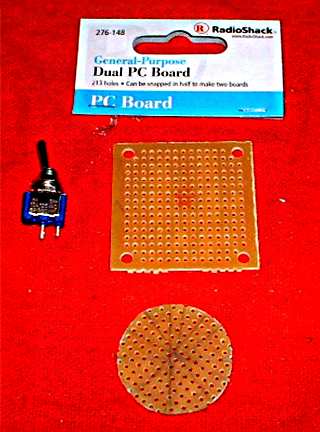
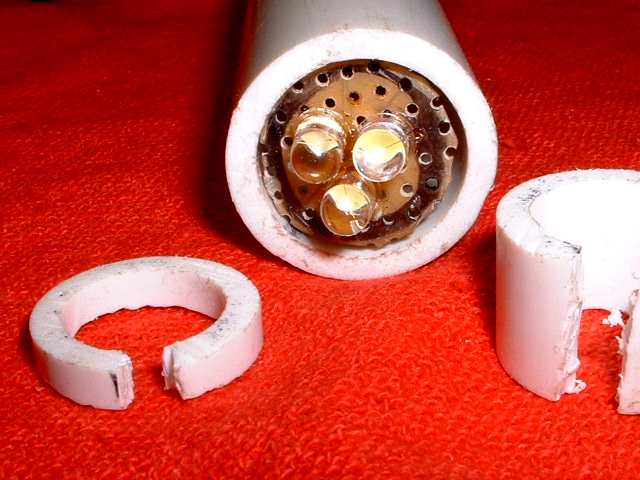
I also gathered some free scraps of PVC pipe. From 1 inch PVC stock I cut one piece 4" in length. From 3/4 inch stock I cut two pieces 1/2" in length and one piece 1/4" in length.
I used this for the light housing, and the three spacers fit inside the housing. The spacers were cut on one side with a hand saw.
![]()
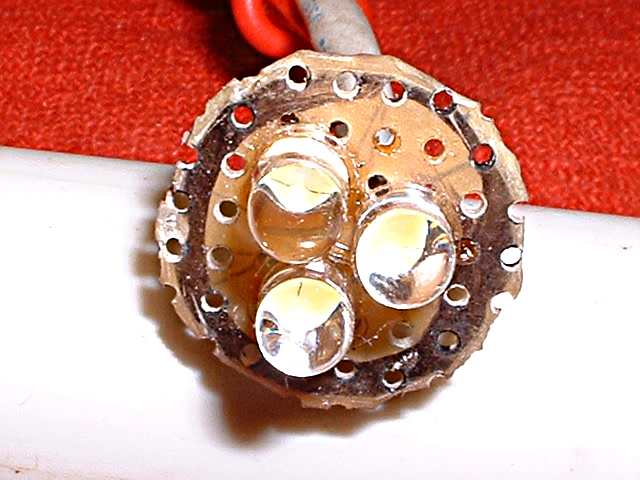
Next I cut the project board in a circle, matching the inside diameter of the light housing. I placed the legs of the LEDs through the perf board. The short leg was for the - circuit and the long leg was for the +. I gathered the three short legs and soldered them to a common black wire -. I attached a 220 ohm, 1/4 watt, resister to each of the long + legs, then soldered all three resisters to a red + wire. 220 ohms puts these LED's close to their optimal output when driven by 12 V. Each LED may have different requirements.

Here is a close up of the LED array.
I placed this assembly in the housing to see if it was a good fit. Looks OK.
Next I soldered the switch. I place the switch in the positive side of the circuit before the load, so when the switch is off there is no current in the application. So far so good...
Then I threaded the wire assembly through the housing and kept the spacers close by.
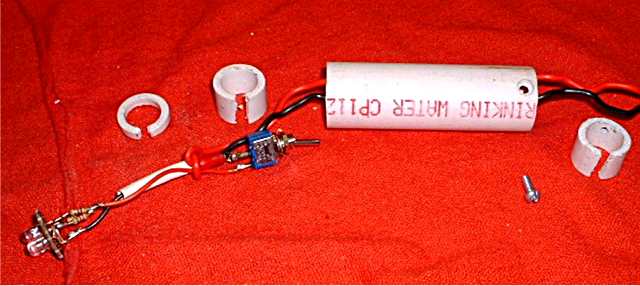
I placed the 1/2" spacer behind the perf board, using it to hold the LED assembly. I passed the wires through the cut, into the center of the spacer.
![]()
Then I inserted the 1/4" spacer in front of the perf board.
![]()
Here is the result...

On the back end I used the other 1/2" spacer. I worked the wires and the leads of the switch through the cut in the spacer.
![]()
I carefully drilled a small hole to receive a set screw. This guide hole went through the spacer and the PVC housing. I turned the screw in part way.
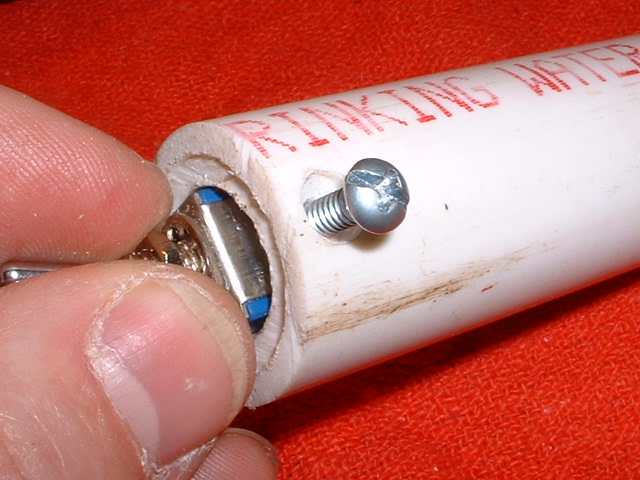
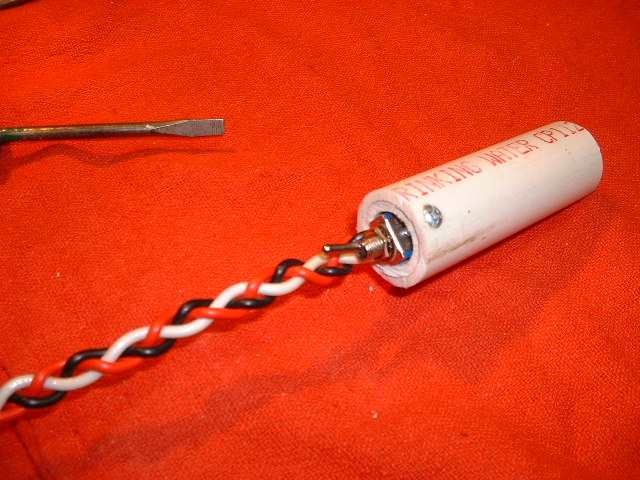
Next I inserted a six-inch length of insulated 10 gauge solid core wire into the cut in the spacer. This was a tight fit!
![]()
When the white wire was in place, I turned the set screw to snug everything together.
The stiff white wire served as a support for the light housing and the circuit wires, which I braided together.
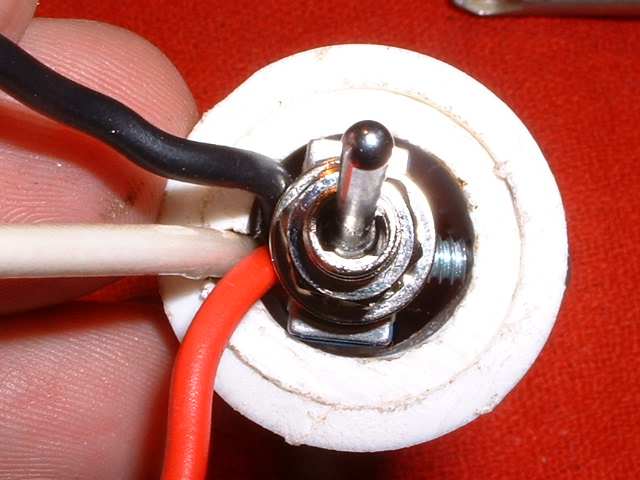
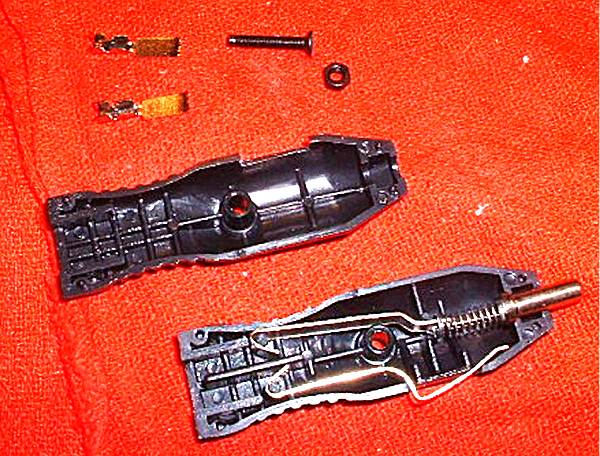
I opened the 12 volt cigarette-lighter style plug to see what I had to work with. I could saw where there was space to drill a hole to receive the end of the white wire, without interfering with the plug.
I marked the outside of the plug, drilled a small hole. Then I attached the black and red leads to the plug. Finally, I fitted the white wire into the support hole, fixed it in place with epoxy glue and clapped it until dry. After the epoxy was dry, I lightly sanded the PVC to remove lettering, paint and dirt.

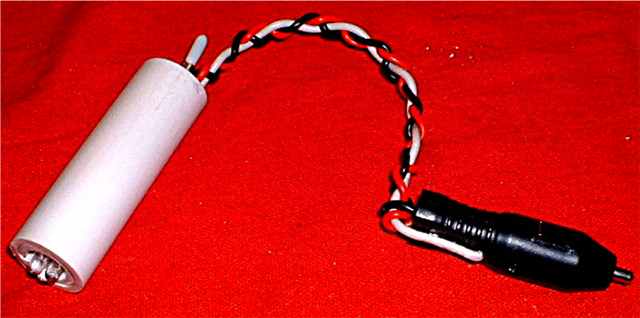
Here it is. The 10 gauge wire was stiff enough top hold the lamp housing. The wire could be bent to direct the beam of light to different positions.
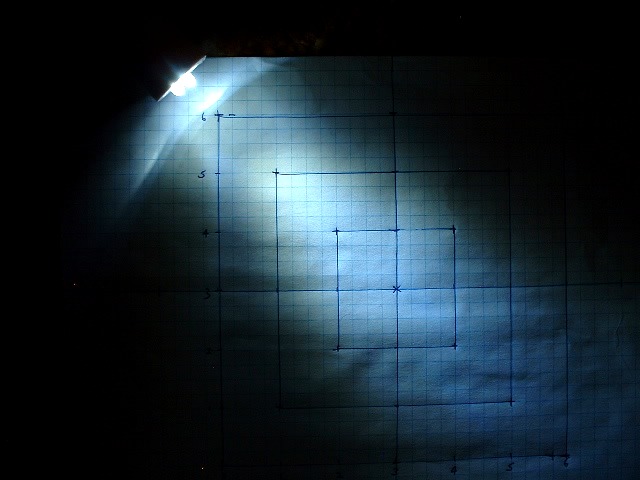
How well does it work? The photo shows the spread of light 12 inches from a grid. The lines in the picture were one-inch squares. I estimate that the three LEDs illuminated an area of approximately 36 square inches at a distance of 12 inches.

Anyone who has used LED light knows that it is different from an incandescent bulb. LED light is bright, but only in a narrow viewing angle directly in front of the bulb. It is hard to light a large area with LEDs. See how narrow the beam of light is. This is without any focusing lens in front of the bulbs!
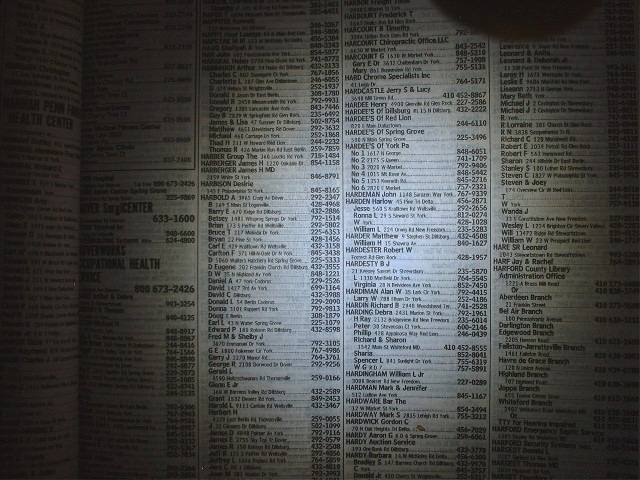
I think it will be just enough spread to fill the pages of a paperback book, when the beam is on the page. But can you actually read by this light? The photo below shows what a phone book looks like illuminated only by the three LEDs. The image is not as clear as it really was because the camera moved slightly in the time exposure.
I think the real advantage of the LED light is the extremely low drain on the battery system. Will I only use LED lighting? Probably not. But it is nice to have one if I need it.
Parts List
Project cost: approx 12 dollars
Other uses might include a map light for a trucker or a car traveler.
Comments welcome.
Please visit this sponsor