© 2004, 2005, 2006, 2007 by Man of the Cloth Productions
I was encouraged by the example of other homebuilders to use a Harbor Freight trailer. Harbor Freight products can be ordered on the web at www.harborfreight.com . They will ship the trailer right to your door. There is a Harbor Freight store within fifty miles of my home. I waited until the HF trailer went on sale and bought it there. It took me two Saturdays to complete the work of assembling the trailer, following the manufacturer’s directions. It wasn’t hard, just time-consuming. The directions that came with the kit were helpful and complete. There were no surprises.
Another source for a trailer is the Red Trailer company. They specialize in the 5' x 8' trailer that can be used for a wider Teardrop.
I didn't buy the heavy weight trailer from Harbor Freight, but many builders do use the heavy weight frame. Estimate the final weight of what you are building. The Gross Vehicle Weight Rating (GVWR) of the frame has to be greater than the trailer you finally build. If you plan on taking the trailer off-road, get the heavy frame.
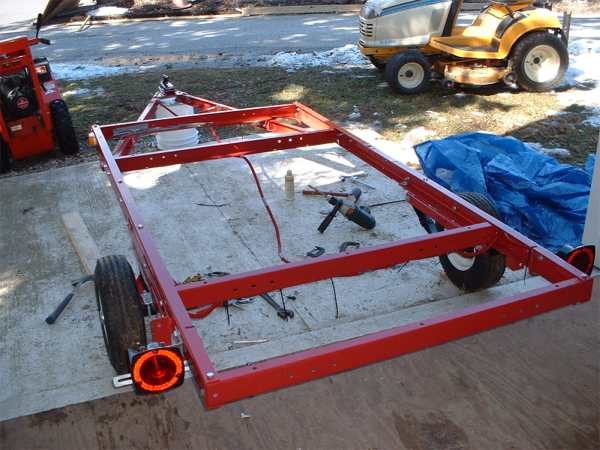
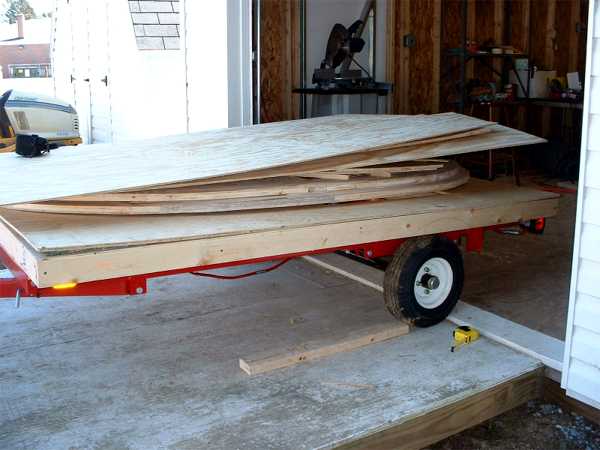
Working with the mechanic who helped me with the trailer inspection, I modified my frame. This specific trailer was manufactured as a folding trailer. As a folding trailer it had two halves that hinged at the side rails of the trailer. The center rails of the two halves were supposed to be bolted together for using this trailer on the road. When these center rails were unbolted, the two halves folded together for storage. I wanted a more rigid structure. My first step was to remove the two center rails. You can see them propped in the picture below. I also removed the set of side rail hinges (not pictured).

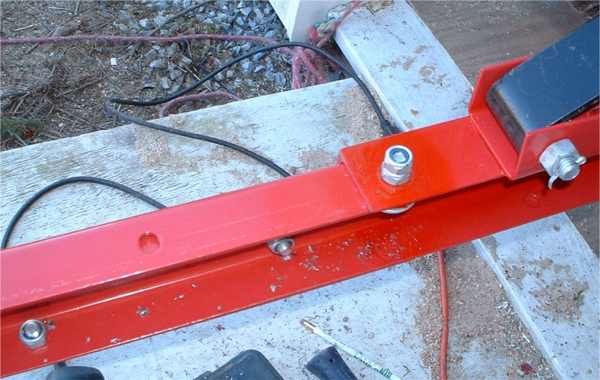
I repositioned one of the center rails as a support in the left side rail and the other in the right side rail. Below, you can see the center support rails are dimensionally smaller than the side rails; they nest inside the side rail perfectly.
I used a titanium drill bit to drill four new holes through the side rails to join and mate the steel rails I inserted. The result was wonderful! The two halves formed a single trailer. The position of the extra steel in the side rails extended over the axel carriage, adding strength.
While I was working on the frame, I decided to move the axel/wheel carriage back 4 " from the original placement of the carriage. The first step was to turn the entire trailer over. I removed the bolts that held the axel carriage assembly to the trailer body. This allowed the carriage to slide forward and backward as needed for positioning.
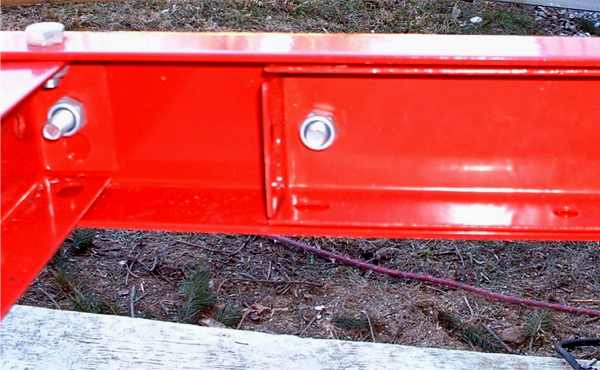
I moved the carriage back four inches so the trailer would follow the tow vehicle more smoothly. By coincidence, this put the back of the carriage against a bolt head from the rear cross member. You can see this in the picture below.

To be sure the placement of the carriage was true to the frame hitch, I used two tests. The first test was a “high-tech” method. I used a string to measure the distance from the center point on the hitch to the closest point of the tire. I marked the place on the string and checked the other side. I discovered that one side of the wheel carriage was 1/4" closer to the hitch. This was from an excess of weld when the manufacturer attached the bracket that was part of the folding design. The weld of this bracket was of no structural significance, so I used a portable grinding wheel to remove the excess weld. When I rechecked the wheel carriage placement, the distance from the hitch to each wheel was the same.
For a second test, I used a tape measure and checked the distance from the front of this wheel assembly to the manufacturer's reference points on the front of the frame. All measurements matched for each side.
I clamped the carriage in place and marked the place for the new holes that needed to be drilled. I made sure the placement of the new bolt holes matched the number and pattern of the original configuration for mounting the carriage on this trailer. Some of these bolts that mount the wheel carriage went through three layers of steel. My modifications made the side rails more rigid and the wheel carriage was mounted through more steel than before. I painted each new hole with rust proof spray paint before inserting the bolts.
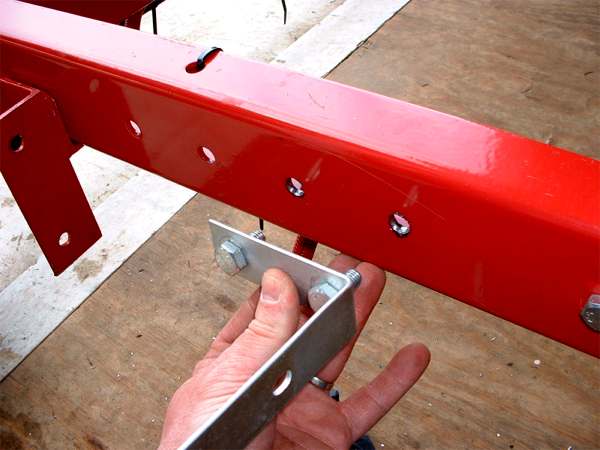
I also drilled two new holes to reposition the bracket for the brake lights. I moved them 4 " closer to the back so the built-up deck would not hide the lights.
I temporarily placed the framed plywood deck and the materials for the trailer walls as well as the bulkhead on the trailer frame. This gave me a preliminary check on the clearance for the wheels, the visibility of the brake lights, and a quick check on the preliminary tongue weight.
I borrowed the bathroom scale and weighed the tongue with this rig. My dog Nellie approved of the number.

Each State has its own requirements for getting a trailer on the road. PennDOT is the state agency responsible for this in PA. I used a company in the next town that had a direct vehicle registration line to PennDOT in Harrisburg.
My first step was to pick up a booklet supplied by PennDOT that is used to apply for a title for an unlicensed trailer. The booklet requires clear photos of the front, side and back. I included additional photos of the safety chains, the trailer manufacture's VIN tag located on one of the tow arms, and a photo of the trailer license hanger. To help answer PennDOT questions, I sent more pictures than required. They also required a copy of the assembly instructions for the trailer, and a weight ticket of the empty trailer from a commercial scale company. This was a real catch 22. PennDOT required me to take the trailer to a weigh station without a license in order to get a license. I had to be “creative” to solve this one.
Then I had a certified mechanic inspect the trailer, verify the lights and other safety features of the trailer, complete the application booklet, and sign all the photos. I took these materials along with the sales slip from trailer purchase, as well as the manufacturer’s certificate of origin document, to the title service company. They filed the application for title and tags in one step. 4-6 weeks was the best turn-around time I could hope for in PA. I received my title, license and a new PA VIN plate in 9 weeks.
I asked the local police as well as my mechanic about the use of trailers in PA. He told me that in PA, once the trailer is licensed, I could put anything on a trailer as long as the safety chains and clearance lights remained. Also, the loaded trailer could not exceed the trailer’s gross vehicle weight rating and the load had to be attached securely to the trailer. This information helped me decide to license the trailer first, and then build the Zephyr on it after it was licensed.
Please visit this sponsor

.